Keeping track of all the things that are happening on your machine can be a daunting task, whether it’s expected events or unexpected warnings and errors that you want to inform the user of. Luckily, Beckhoff provides us with a tool that can help with that: namely, the EventLogger. In this article, I will introduce the PLC part of the EventLogger and show some useful features (code: PlcPart). A second article will show how to visualize the events using TwinCAT’s web-based HMI (TE2000) (code: HmiPart).
Thanks to Jakob Sagatowski for his valuable feedback while writing this article.
You can create events on the PLC in EventClasses, as shown in the image below. The events themselves can be of two different types. First, there is the stateless message type which can only be sent. Second, there is the alarm which also has a state. The states of the alarms work as follows. There are two mutually exclusive states: raised and cleared, and an optional third state: confirmed, which is independent of the first two. The raised and cleared states are used to indicate if an alarm condition is fulfilled (e.g., a temperature is above a certain limit). The optional confirmation state can be used to indicate that the user has seen the alarm and is aware of it. Finally, all raised alarms are automatically cleared when the PLC is restarted, but they are not automatically confirmed.

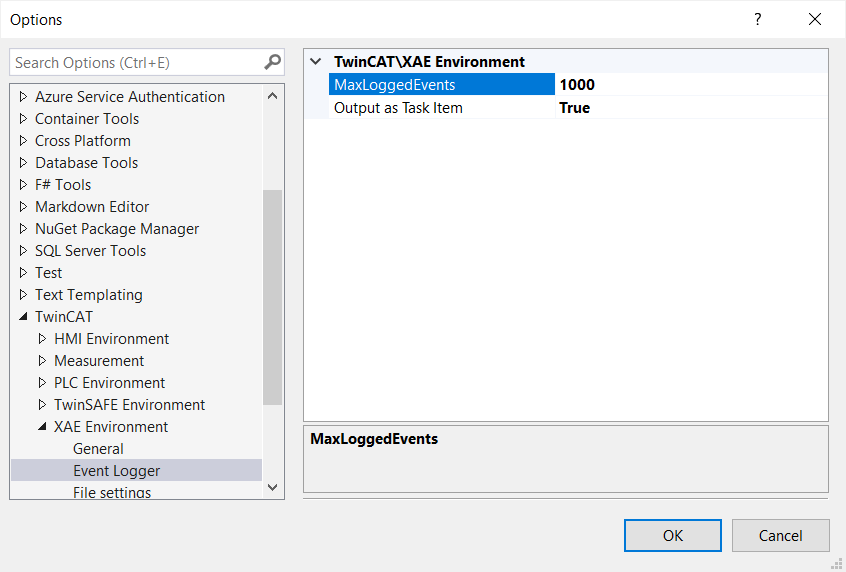
A limited number of past events are cached in a local database file on the hard drive in C:\TwinCAT\3.1\Boot\LoggedEvents.db. The maximum number of logged events is set to 1000 by default and can be changed under Tools > Options > TwinCAT XAE Environment > EventLogger, as shown below. This database is not cleared when you restart the PLC, so you can view past events. For more details on the EventLogger, there is an extensive manual available, and InfoSys has a few tutorials and examples.
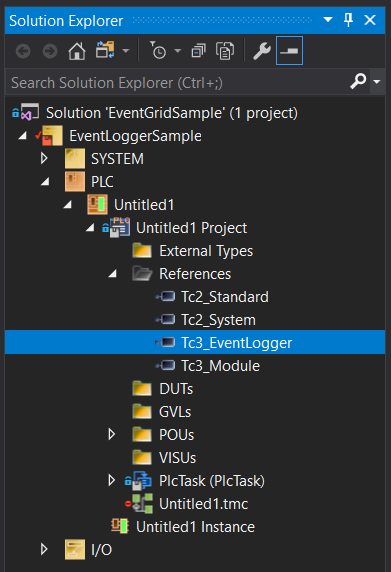
Now we know a little about the theory behind events, let’s look at an example. You can download the example project from the PlcPart folder. I’ve created a standard TwinCAT XAE project with a standard PLC project. I then added the Tc3_EventLogger library under References as shown in the image below. This library contains all the function blocks we need for the events.
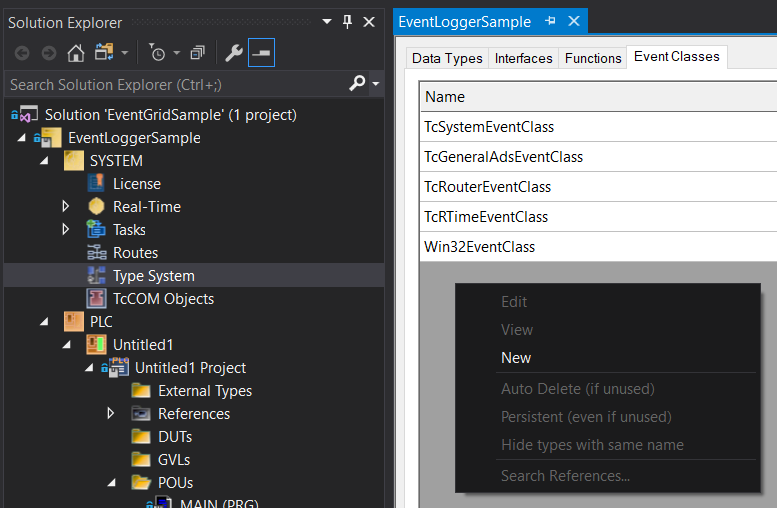
Before we start sending messages and raising events, we’ll create a new EventClass. In an EventClass, a number of related events can be organized. Of course, you can also use the standard TwinCAT events (e.g., TcSystemEventClass, as shown below), but those are probably not so relevant for the end user. You can add a new EventClass by going to SYSTEM > Type System and then select the tab Event Classes, as shown below. Then, right-click on the empty field to create a new EventClass.
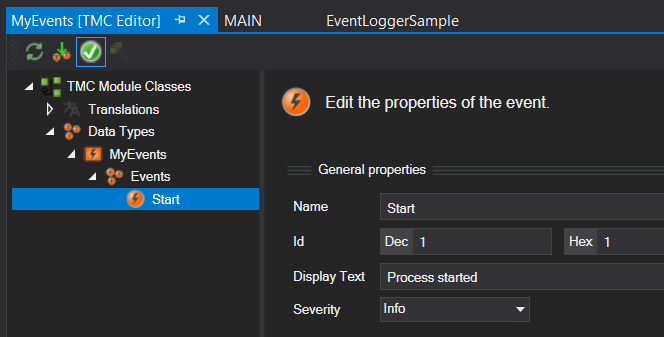
A TMC editor window should open. I named the EventClass MyEvents and set the display text to My events. The name can’t contain spaces and will be used in the event declaration, as we will see in a minute. The display text is one of the things which can be shown to the user and can be a general description of the EventClass.
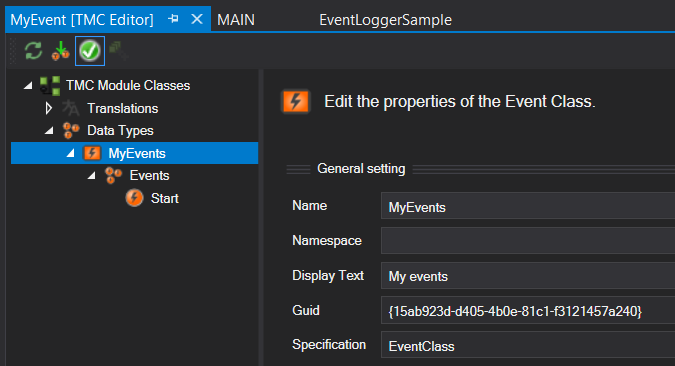
Then, I renamed the first default event to Start and added Process started under Display Text. Finally, I gave this event the severity of Info because it will be used for a message.
We can then start adding code to send this message. For that, we create a program SendMessage. In the program declaration, we make an instance of FB_TcMessage. This function block will contain all the information about our message event.
PROGRAM SendMessage
VAR
    bIsInitalized : BOOL;
    fbMessage : FB_TcMessage;
    bSendMessage : BOOL;
END_VAR
Before we can use it, we have to initialize it as shown below. This is done by calling the CreateEx method. This method takes two arguments for a message event. The first argument, TC_Events.MyEvents.Start, is the event we created earlier in our custom event class. The second argument is where you can enter a source of the event. An example of a source could be if the message belongs to a certain component in your machine, then you can give it a specific name. I’ll show an example of this at the end of this post. For now, we set it at 0, which will give it a default source name. By default, the source name is the program+function block path to the event. So, for this event, the source name is SendMessage.
IF NOT bIsInitalized THEN
    bIsInitalized := TRUE;
    fbMessage.CreateEx(TC_Events.MyEvents.Start, 0);
END_IF
Finally, to send the message, we call the Send method. The send method takes one argument, which is the timestamp of the message. If you set it to 0, it takes the current time, and if it is larger than 0, it takes the time in 100 nanoseconds since January 1st, 1601 (UTC).
IF bSendMessage THEN
    bSendMessage := FALSE;
    fbMessage.Send(0);
END_IF
The complete code is then as follows:
PROGRAM SendMessage
VAR
    bIsInitalized : BOOL;
    fbMessage : FB_TcMessage;
    bSendMessage : BOOL;
END_VAR

IF NOT bIsInitalized THEN
    bIsInitalized := TRUE;
    fbMessage.CreateEx(TC_Events.MyEvents.Start, 0);
END_IF

IF bSendMessage THEN
    bSendMessage := FALSE;
    fbMessage.Send(0);
END_IF
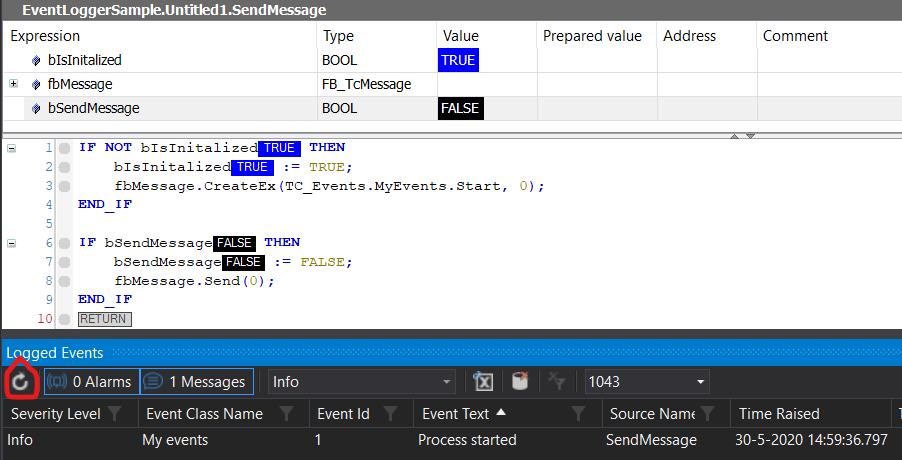
Now we can activate our configuration. In order to see our events, we need to activate the Logged Events window, which can be found under View > Other Windows > TwinCAT Logged Events. This logger shows up to 1000 (as set earlier) past events.
Now log into the PLC. You should see something which looks like the image below. If you set bMessage to TRUE, a message should be sent to the event logger. To see it in the Logged Events window, refresh the logger using the refresh button on the bottom left of the image. The logger shows an overview of the different parameters of the class name, the event is part of, the info of the event itself, and the time it was sent.
From the logged events window, it is also possible to remove past events from the database using the button on the right, as shown below. As far as I know, this is the only way to remove old events from the database.

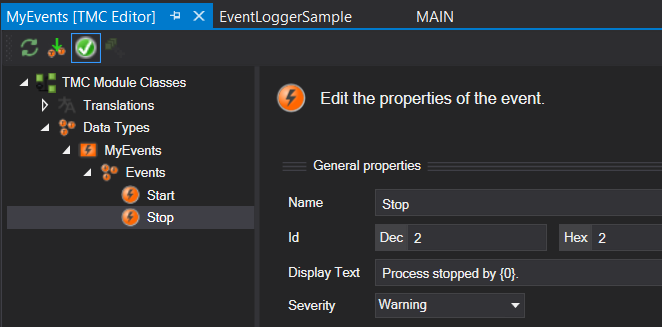
Now let’s add some more code so we can also see the behavior of alarms. First, I add a new event to the event class. I give it the name “Stop” with the severity “Warning”. For the display text, I also added an argument {0}. Later we can use this to add custom text to the display text.
To use this alarm, we’ll create a new program, ConfirmableAlarmWithArguments. First, we make an instance, fbAlarm, of the FB_TcAlarm function block in the program declaration.
PROGRAM ConfirmableAlarmWithArguments
VAR
    bIsInitalized : BOOL;

    fbAlarm : FB_TcAlarm;
    bRaiseAlarm : BOOL;
    bClearAlarm : BOOL;
    bConfirmAlarm : BOOL;
END_VAR
Then we initialize the alarm using the CreateEx method. The first argument this method takes is the same as for the message: it is the event we created earlier, TC_Events.MyEvents.Stop. The second argument defines if this alarm should have the optional confirmation state, which I set to TRUE in this example. The third argument is the event source information; more on this later.
IF NOT bIsInitalized THEN
    bIsInitalized := TRUE;
    fbAlarm.CreateEx(TC_Events.MyEvents.Stop, TRUE, 0);
END_IF
Before we can raise the alarm, we need to fill in the {0} argument. This is done in the line fbAlarm.ipArguments.Clear().AddString('Alice'), which utilizes a fluent interface. The property ipArguments returns all the arguments present in the event text, which are then reset with the Clear() method just to be sure. With the final method, AddString(), we add our custom string to the first and only argument in the event text. You can then raise the alarm with the Raise() method, which takes a single argument. This argument is the time, which we set to 0 to take the current time.
IF bRaiseAlarm THEN
    bRaiseAlarm := FALSE;
    fbAlarm.ipArguments.Clear().AddString('Alice');
    fbAlarm.Raise(0);
END_IF
In order to confirm an alarm, we add the following code. Here, the Confirm() method takes a single argument, which is the time of confirmation. When set to 0, it takes the current time.
IF bConfirmAlarm THEN
    bConfirmAlarm := FALSE;
    fbAlarm.Confirm(0);
END_IF
Finally, we add the following lines to clear an alarm. The Clear() method takes two arguments. The first one is the time again, which we set to the current time with 0. The second argument determines if this alarm should be confirmable after it has been cleared or, in Beckhoff’s language, if the alarm’s confirmation state should be reset. By setting the argument to FALSE, the confirmation state is not reset. So you can confirm it after it has been cleared. When it is set to TRUE, the confirmation state is reset, and you can’t confirm it once it has been cleared.
IF bClearAlarm THEN
    bClearAlarm := FALSE;
    fbAlarm.Clear(0, FALSE);
END_IF
So our complete code then looks like this:
PROGRAM ConfirmableAlarmWithArguments
VAR
    bIsInitalized : BOOL;

    fbAlarm : FB_TcAlarm;
    bRaiseAlarm : BOOL;
    bClearAlarm : BOOL;
    bConfirmAlarm : BOOL;
END_VAR

IF NOT bIsInitalized THEN
    bIsInitalized := TRUE;
    fbAlarm.CreateEx(TC_Events.MyEvents.Stop, TRUE, 0);
END_IF

IF bRaiseAlarm THEN
    bRaiseAlarm := FALSE;
    fbAlarm.ipArguments.Clear().AddString('Alice');
    fbAlarm.Raise(0);
END_IF

IF bConfirmAlarm THEN
    bConfirmAlarm := FALSE;
    fbAlarm.Confirm(0);
END_IF

IF bClearAlarm THEN
    bClearAlarm := FALSE;
    fbAlarm.Clear(0, FALSE);
END_IF
After activating the configuration, you can raise, confirm, and clear or clear and confirm the alarm, and view the state and times in the Logged events window. You should see something like below. Note that the event text displays the name of the operator who stopped the process.

PROGRAM AlarmWithCustomSourceInfo
VAR
    bIsInitalized : BOOL;
    fbAlarm : FB_TcAlarm;
    bRaiseAlarm : BOOL;
    bClearAlarm : BOOL;
    fbSourceInfo : FB_TcSourceInfo;
END_VAR
We can then initialize fbSourceInfo with the source name, as shown below. First, we call the Clear() method on fbSourceInfo to reset the source information. Then, we add our custom name with fbSourceInfo.sName := 'Water pump 3'. Finally, we create a new alarm, where we pass our custom fbSourceInfo as an argument: fbAlarm.CreateEx(TC_Events.MyEvents.Stop, FALSE, fbSourceInfo). Note that this alarm is created as a non-confirmable alarm since the second argument is false.
IF NOT bIsInitalized THEN
    bIsInitalized := TRUE;
    fbSourceInfo.Clear();
    fbSourceInfo.sName := 'Water pump 3';
    fbAlarm.CreateEx(TC_Events.MyEvents.Stop, FALSE, fbSourceInfo);
END_IF
The part to raise the event is the same as the previous example, only I added another name.
IF bRaiseAlarm THEN
    bRaiseAlarm := FALSE;
    fbAlarm.ipArguments.Clear().AddString('Bob');
    fbAlarm.Raise(0);
END_IF
Also the clear alarm part is the same. However, because this alarm doesn’t have a confirmation state, the second argument in the Clear() method doesn’t have any influence.
IF bClearAlarm THEN
    bClearAlarm := FALSE;
    fbAlarm.Clear(0, TRUE);
END_IF
The complete code is as follows:
PROGRAM AlarmWithCustomSourceInfo
VAR
    bIsInitalized : BOOL;
    fbAlarm : FB_TcAlarm;
    bRaiseAlarm : BOOL;
    bClearAlarm : BOOL;
    fbSourceInfo : FB_TcSourceInfo;
END_VAR

IF NOT bIsInitalized THEN
    bIsInitalized := TRUE;
    fbSourceInfo.Clear();
    fbSourceInfo.sName := 'Water pump 3';
    fbAlarm.CreateEx(TC_Events.MyEvents.Stop, FALSE, fbSourceInfo);
END_IF

IF bRaiseAlarm THEN
    bRaiseAlarm := FALSE;
    fbAlarm.ipArguments.Clear().AddString('Bob');
    fbAlarm.Raise(0);
END_IF

IF bClearAlarm THEN
    bClearAlarm := FALSE;
    fbAlarm.Clear(0, TRUE);
END_IF
If we then activate our configuration again and raise and clear the alarm with our custom source information, it should look like the image below. Under the source name, you now see the name we defined earlier with fbSourceInfo.sName, instead of the program name.

I hope you learned something new today! In a future post, I’ll show how to visualize the events in TwinCAT’s web-based HMI (TE2000).
Discuss: Reddit.